
When you start using Quickbooks Online to track your finances, you will have connected your bank accounts, credit cards and other facilities to automatically fetch these transactions to classify. The purpose of performing reconciliation is to answer the question: how do you know your account balance in Quickbooks is correct?
The process of reconciliation is to confirm an accounts’ balance, by using something, like a statement, outside the accounting system, to verify the calculated balance reported inside the accounting system. Therefore, reconciliation is performed on accounts that maintain a running balance, for example, bank accounts, credit card accounts and loan accounts.
When To Reconcile In Quickbooks?
How often should you reconcile your accounts? For my personal transaction accounts ideally I should be reconciling at least once a month. Especially when I’m looking to project into the next month for my budget, I need to know how much I spent on a particular category and the only way I’m going to accurately know how much I spent is by doing a reconciliation on my accounts.
However, if I have found the transaction capture from Quickbooks to be quite stable throughout the month I tend not to be too concerned about the accuracy of my transactions as Quickbooks has been capturing my transactions without many problems over the years.
The reality of how I often I reconcile my bank account and credit cards ends up being around 6 months.
Other accounts that tend not to have too many transactions happening in the month tend to be done at the end of the financial year . This is the limit to how often you should be reconciling your accounts as you’ll want to make sure with your income tax return you’re providing the government with accurate financial data.
How Do You Reconcile In Quickbooks?
Here is a step by step process on how to reconcile your accounts in Quickbooks Online:
Step 1 – Get Statement
To get started with reconciling in Quickbooks you need to get the external statement that reports the closing balance of the account you wish to check in Quickbooks. There’s no point going any further until you get this statement, so go and grab it, then move on to the next step.
Step 2 – Reconciliation In Quickbooks
To find the reconciliation area in Quickbooks, login to your account and hover your mouse cursor over the “ Accounting ” menu and then click on the sub-menu labelled “ Reconcile “.
Here you’ll be presented with a screen that will help start the process of reconciling an account. Notice the information presented:
- A balance sheet account (assets, liability or equity accounts are the only types listed).
- A section to enter the ending balance and the date of that balance.
- A section to enter the service charge, date when that was charged and which account to place those charges, and (for only some asset accounts) the ability to enter the same information, but for interest received in that account.
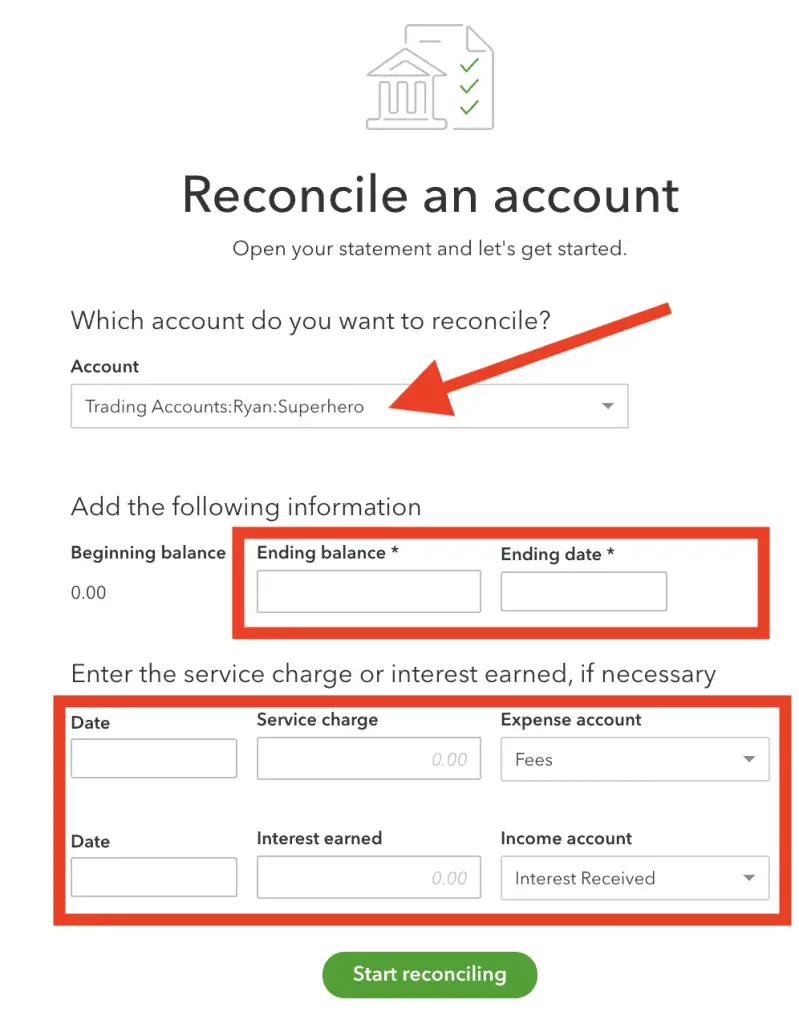
This third section I’ve found helpful for accounts that are not connected via bank feed into Quickbooks, and for which there is only ever one transaction performed each month (one current example for this is our mortgage account).
To get started with reconciling this account, I’m going to enter my closing balance as at the end of the financial year 30/06/2021. I’m going to skip the charges and interest earned section, and click Start reconciling .
Step 3 – Reconciliation Process
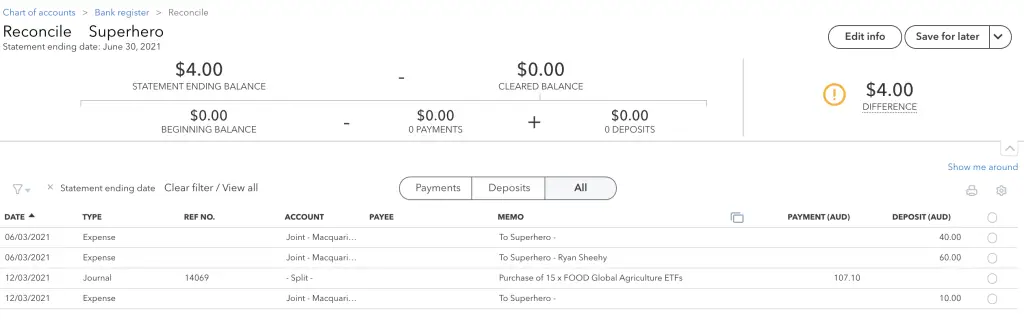
You will be presented with a reconciliation screen showing all unreconciled transactions up to and including the date entered on the previous screen. In my example, as I entered 30/06/2021 as the end date, and a balance of $4.00 you can see this information in the upper-left section, with all unreconciled transactions in the lower half of the screen.
The easiest way to check if all transactions listed match the closing balance is to click on the top-most circle on the right-hand side. This will trigger an automatic selection of all transactions in the list:
When you do this, Quickbooks will tally all the transactions to see if they match the closing balance. From the example above, you can see my reconciliation doesn’t match the balance and I have a difference of $1.10.
If I have a difference in my transaction data compared to the actual balance, I go through manually line by line against each transaction in my statement.
Step 4 – Reconciliation Edits
Thankfully, there are several ways to edit elements within a reconciliation.
Edit Transactions
If a transaction needs to be edited in the list, the easiest way to modify it is to select the row, which will expand and provide a context menu for that transaction with several options, one being to Edit and when this is clicked will take you directly to that transaction to apply any edits. When that transaction is saved, any changes to that transaction are applied and the amounts will change in the reconciliation screen.
Edit Balance
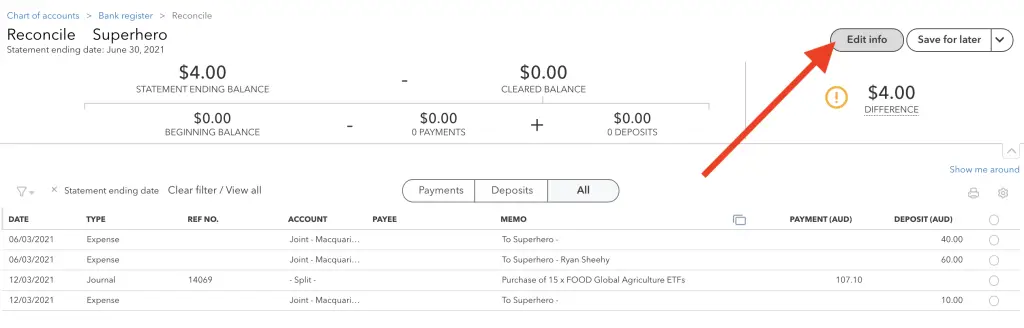
If you’ve realised you’ve entered the closing balance incorrectly, you can easily modify this information by clicking on the Edit Info button found above the difference value, here:
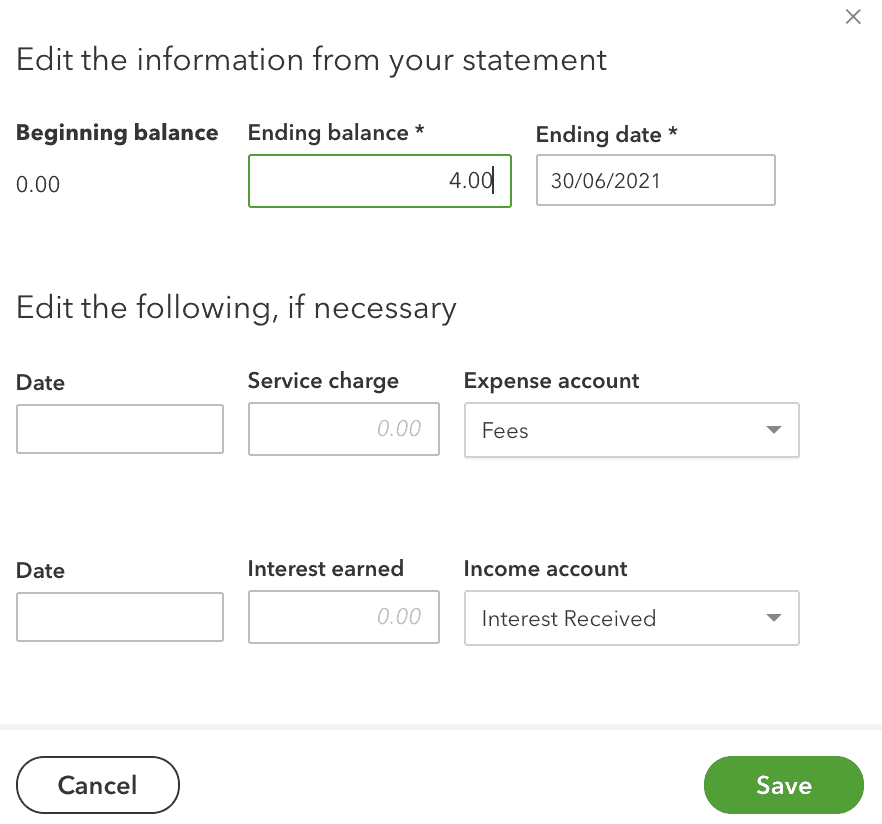
Upon clicking this button, you will be presented with a familiar window containing the initial information you inserted when starting the reconciliation. This window has popped up on the left-side of my screen:
Edit Reconciliation
Besides editing transactions within a reconciliation, or the closing balance and date, you also have the ability to come back to a reconciliation at any time.
By clicking on the Save for Later button in the upper-right hand corner, you can elect to come back to your reconciliation at a later time. This might be handy when you completely forgot to add a batch of transactions that your account statement has shown to be missing.
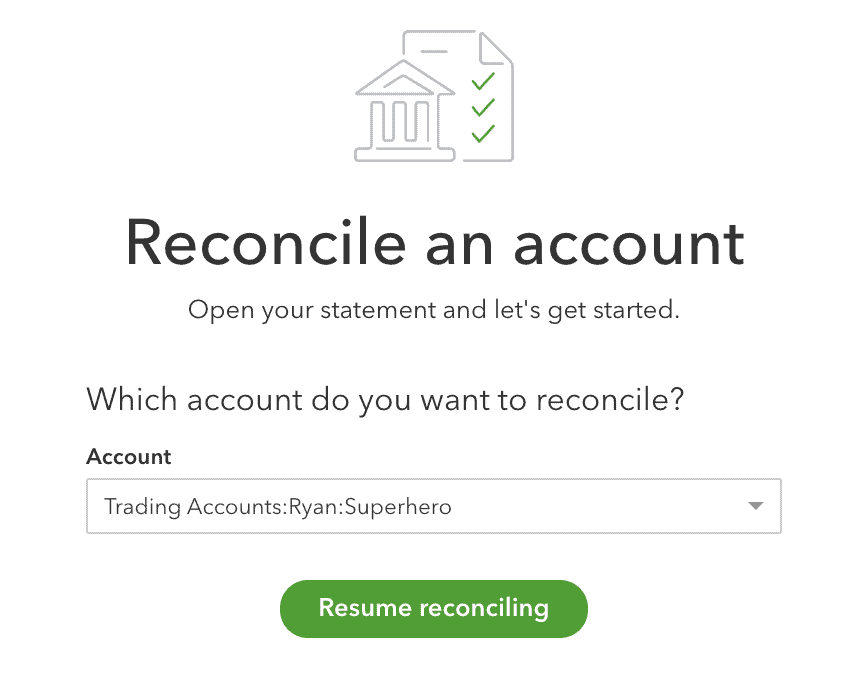
When you return to the Accounting > Reconcile screen for the account you will notice that it doesn’t ask for any closing balance or date, instead you only have the option of resuming a saved reconciliation:
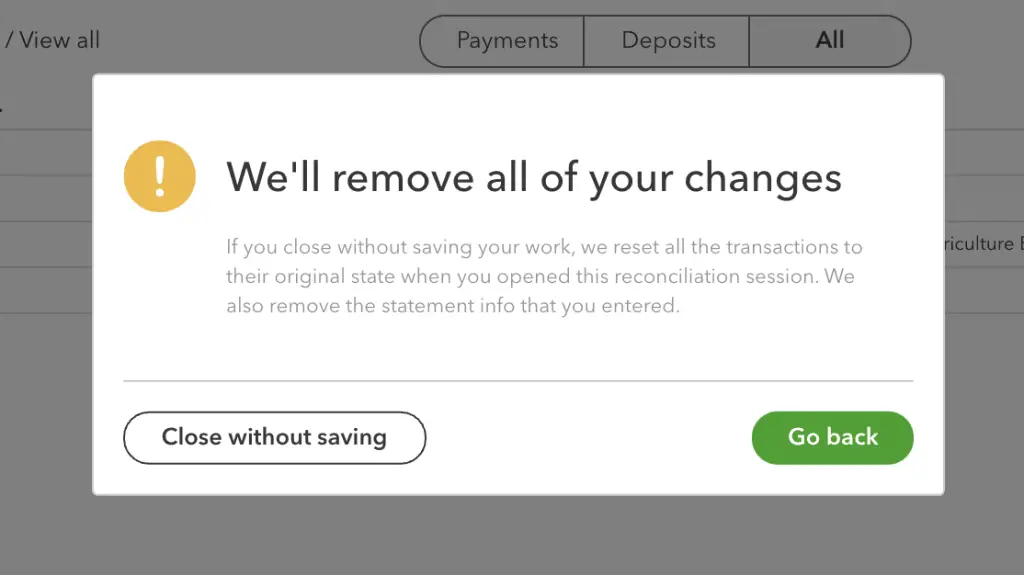
The Save for Later button also provides the ability to exit a reconciliation without saving any information, and you’ll receive a prompt confirming you want to do this:
Step 5 – Successfully Reconciling
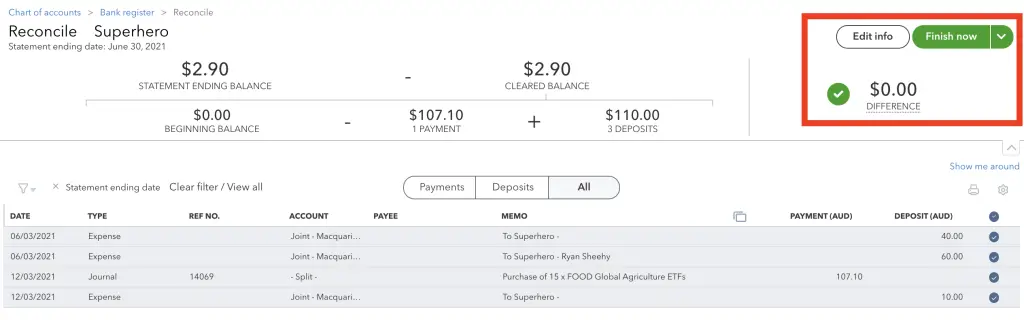
You’ll know you’ve got all the ducks lined up with your accounts’ reconciliation when you can see a green tick against your closing balance, and the Save for Later button has changed to a green Finish now button.
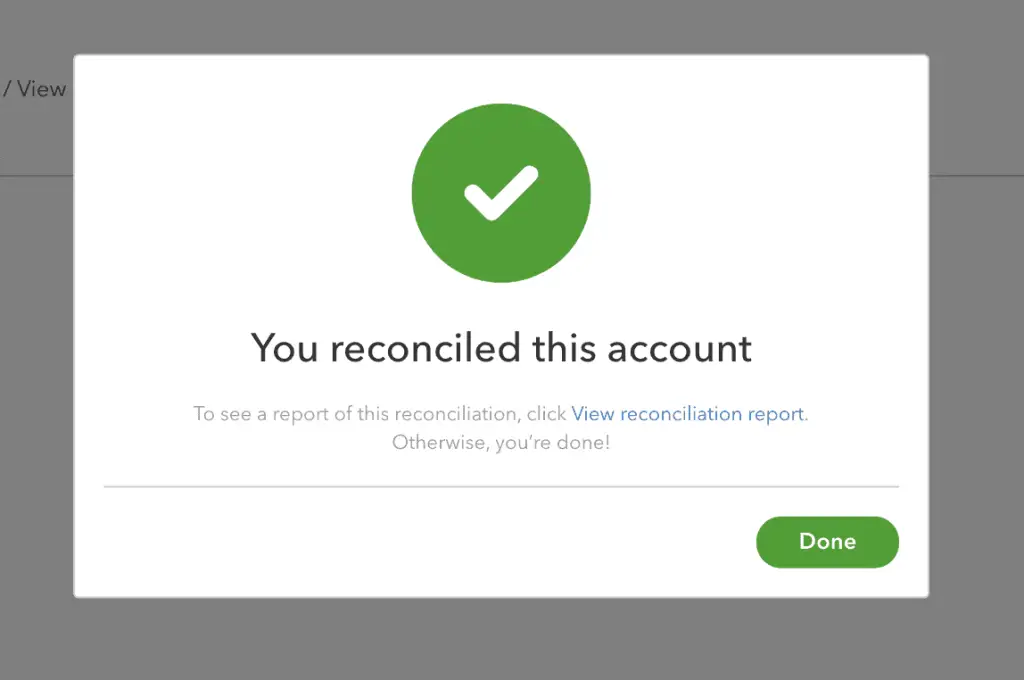
Upon clicking the Finish now button, you will see a confirmation window like below:
Where To Find Quickbooks Reconciliation Report?
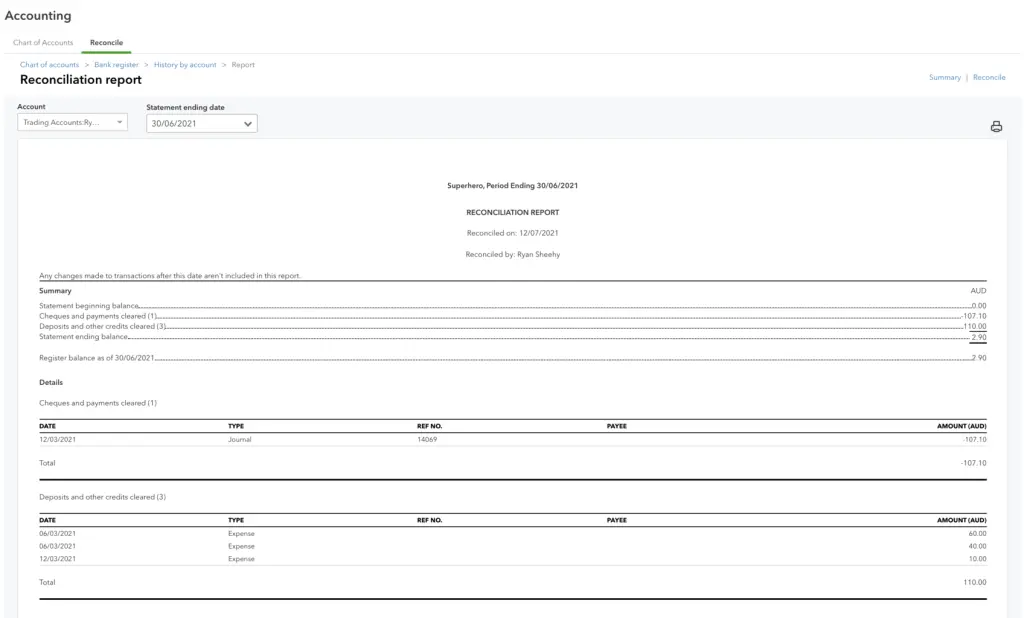
On the confirmation window of a completed reconciliation, you will notice there’s a link to View reconciliation report . By clicking this link you’ll be taken to a report detailing the following information:
- What account was reconciled
- Who reconciled it
- When was it reconciled
- What was reconciled
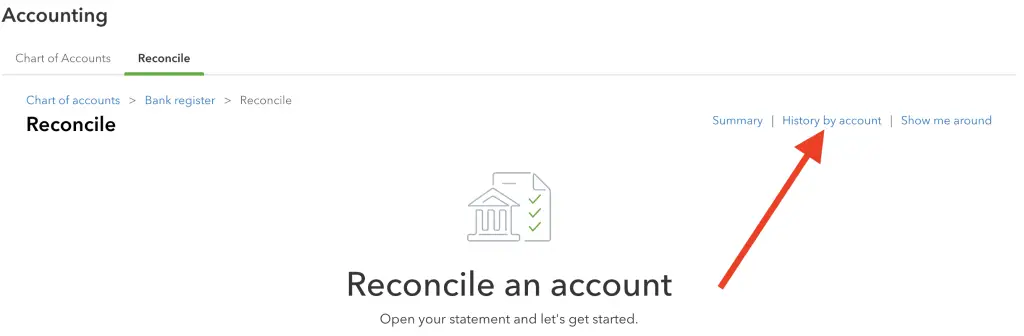
To navigate to this report upon logging into to Quickbooks, click on the Accounting menu, then Reconcile , then select the link History by account found here:
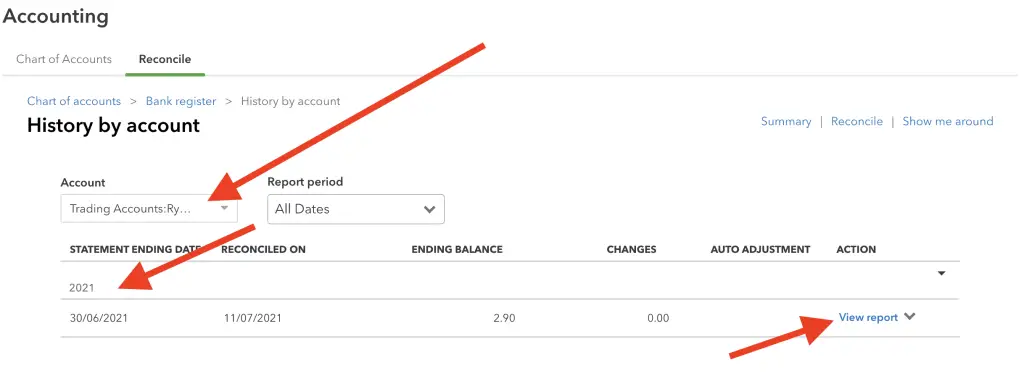
From this page, select the account, then the year, and within this context you will see a list of reconciliations which will enable you to View report , as shown here:
Summary
Most accounting package will provide an ability to reconcile your accounts, and this process is an important part of tracking your money so that you can be assured the balances being reported in your bank account and other accounts are correct.
Quickbooks Online provides an easy and flexible interface to get reconciling out of the way quickly.